In this lesson you'll create the same chair by
drawing lines and then giving them thickness.
Think of thickness as the height of the line or how tall
it is (like a fence in your yard). This is different from the width of the line that
you learned in the polyline lesson. This
is a quick, simple way of achieving some degree of 3-D
feel. Once again, remember that in some instances, simple
concepts may do the job. This is also a good technique for AutoCAD
LT users, who don't have the option to draw in true 3-D.
Start a new drawing using the acad.dwt template.
Create 3 layers called SIDES, SEAT, BACK and give them
different colors. Make back your current layer.
Look at the drawing of the chair in Lesson
3-5 for dimensions.
Draw rectangles to create the back, sides and
seat on their respective layers (as if you were drawing
the top view). Do not worry about height, thickness or
anything but the basic outline of the top view.
Select one of the rectangles, right click and select 'Properties". When
asked to select an object, select the polyline that
will become the back of the chair. Leave the palette open for the rest of this exercise.
You'll see the Modify Polyline dialog box pop up and it should
look like the one below.

For this lesson, there are two important
areas to look at. Make sure that your line is located at
and elevation of Zero. From there you want to go into the Thickness text
box and enter 34.
This will give you a polyline that is based where
you drew it and will be 34" thick, meaning that it
will extend 34" in the positive Z-axis. (Entering
a negative number will extend the thickness in the
negative Z-axis.)
Change the properties of the sides and give them a thickness of 24".
Give the seat a thickness of 4 inches. The seat should
be based on Z=0. To move it up to the correct location,
enter the move command and give it a displacement of @0,0,12.
Look at your drawing in the SW isometric 3-D view and
it should look like the one you drew in the wire-frame
exercise. There is one major difference between the
two models. As stated earlier, wire-frame models
do not allow you to hide lines that you might not see in the
real world. With your cursor in the SW isometric
viewport, enter the command HIDE.
You should see that your chair now looks like the one
below.

You'll see that it is now starting to look like a chair. It's
not perfect yet. You can still see the sides through
the seat and the tops of the sides and back are hollow. Once again - think of a fence around your yard.
Save the drawing under the name chair_line_thickness.dwg in your CAD folder (you'll use it in the next lesson).
So far you have learnt two ways to construct a 3-D-like
object and still haven't learnt any new drawing commands.
These methods use 2D commands to achieve 3-D appearances.
Another advantage of these methods is that they can be
used in AutoCAD LT, which doesn't have any true 3-D capabilities
at all.
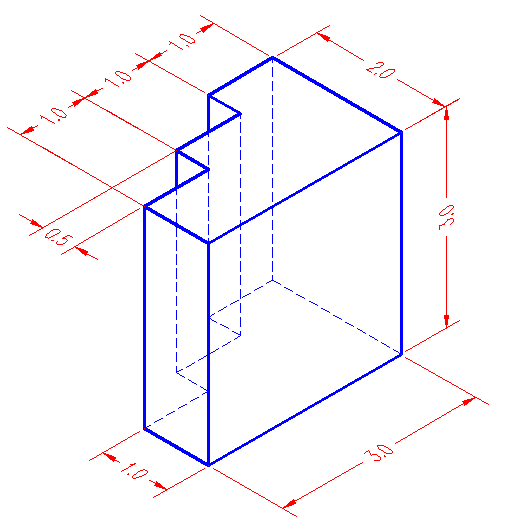
Extra Practice: Create a line thickness drawing of this drawing.
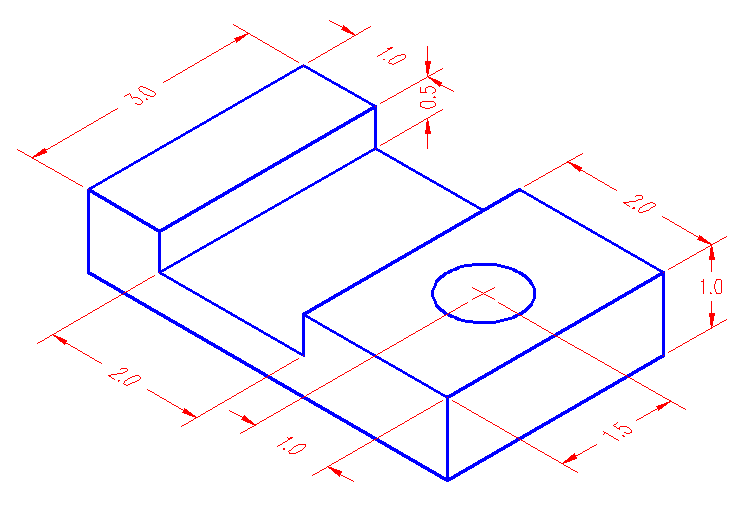
Extra Practice: Create a line thickness drawing of this drawing.
|

